Manipulative Review: Rangometry


In this article I would like to review an extremely colourful and useful learning aid called Rangometry. This teaching-learning aid was introduced by Jodo Gyan, Delhi. This is a very powerful tool that can be used for various classroom activities such as story-telling, counting, visualizing patterns and understanding shapes and angles.
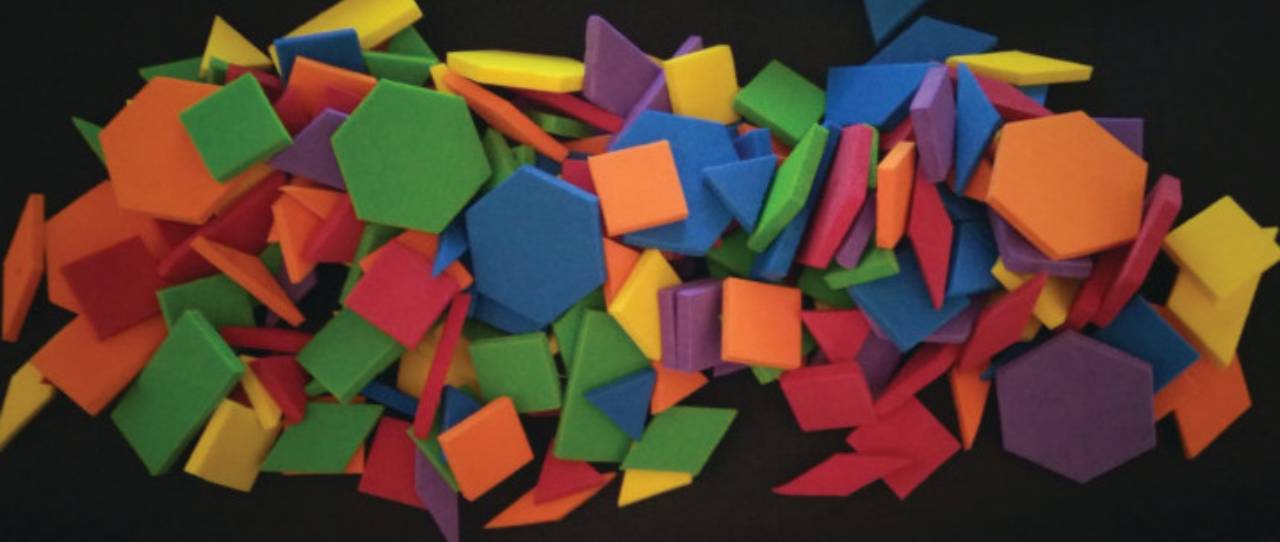
The kit consists of various colourful pieces. A closer look reveals that there are eight different shapes and several copies of these shapes in different colours. Out of these eight shapes, 3 shapes are regular polygons; an equilateral triangle, a square and a hexagon. The rest of the shapes are irregular polygons; an isosceles triangle, two rhombi, a rectangle, and a trapezium.
The lengths of each of these are chosen very carefully and each of these shapes have at least one side of the same length. All the three regular polygons have sides of equal length. Moreover, all the sides of the square and the rhombi are of equal length and differ only in their angles. Similarly, the shorter side of the rectangle is of the same length as the side of the square.

My first experience with Rangometry was with very young children. When the kit was introduced to the children, they immediately took to it due to the bright colours. Children made lots of different designs from the pieces and then started developing stories around them in groups. One of the older children agreed to write up the story for each group. Thus began a very colourful session of story-telling and writing stories.
Several interesting activities involving counting can be done with these pieces. It can begin with children counting the number of pieces they used to make a design or an object. Similarly, the children can be asked to pick a certain number of pieces, or they can draw numbered chits and make shapes with a specific number of objects. Such counting activities are very meaningful to the children and feel purposeful.
| Name | Number of pieces picked up | Design made |
|---|---|---|
| Shivani | 6 | Flower |
| Anjali | 10 | House |
| Jitendra | 7 | Plane |
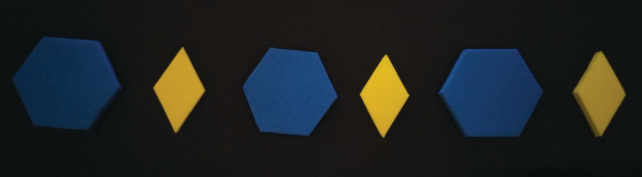
Another interesting activity that can be done with this kit is of visualizing patterns. So, patterns like these ![]()
![]()
![]()
![]()
![]()
![]() can be made using this kit and based on the level of the students, one can ask questions like, ‘What will the 9th shape be?’ or ‘What will the colour of the 50th shape be?’
can be made using this kit and based on the level of the students, one can ask questions like, ‘What will the 9th shape be?’ or ‘What will the colour of the 50th shape be?’
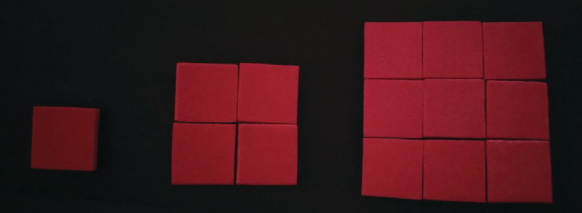
For students from higher classes, patterns involving ‘known’ numbers can also be made. So instead of the number pattern 1, 4, 9, …., one can use the squares to make bigger squares like these which also makes one understand why they are called square numbers.
Making shapes from shapes
Making similar shapes from the pieces is another interesting activity that can be done with the kit. Can you make a triangle using triangles? Can you make a square from squares? What about hexagons from the hexagons?
Making triangle from triangles and square from squares
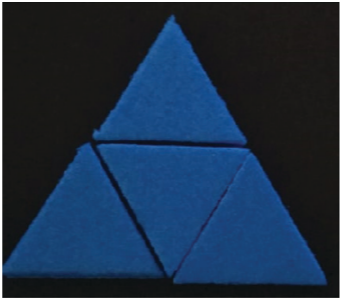
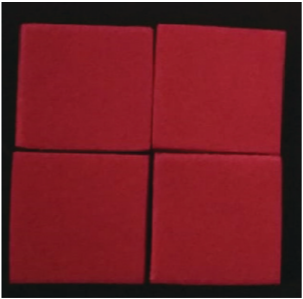
During this activity, interesting discussions can be held in the classroom. Like why is it possible to make a square from squares but not possible to make a hexagon from hexagons?
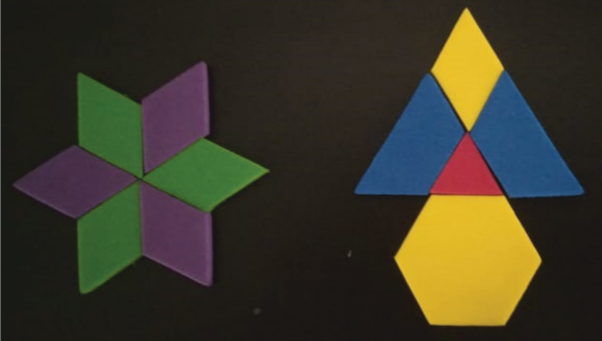
A very interesting exercise that this kit offers is making different polygons from the given shapes. In one such exercise with teachers, the teachers were asked to make hexagons using these pieces. All of them came up with the following configurations. And they concluded that only one type of hexagon can be made with these pieces.
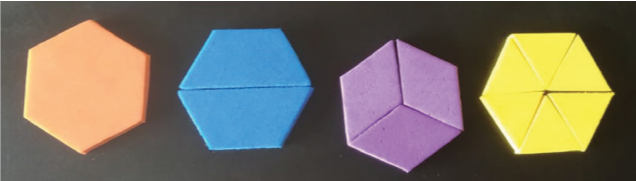
When asked if there were any other hexagons possible apart from the regular ones, all of us realized that when we think about hexagons we picture only regular hexagons, a common mistake made by children too.
Once one explores the idea of making different kinds of irregular hexagons, one finds that a lot of hexagons can be made using these pieces. Some of the hexagons are shown below.
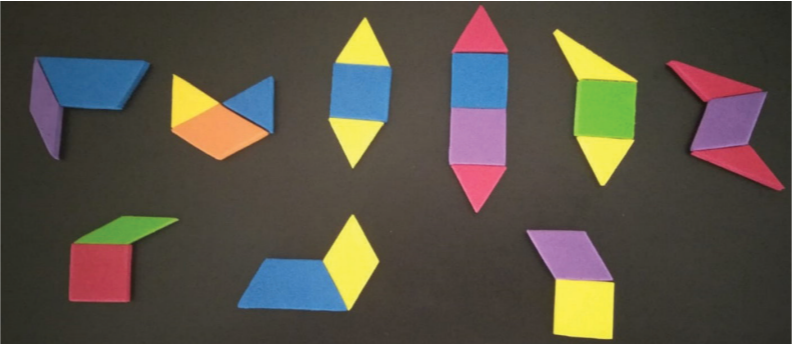
Like hexagons, children can also be asked to make pentagons or octagons. Such exercises help children think of polygons beyond the regular polygons. There can also be a discussion on whether one can find a pattern in making these polygons. For example, in hexagons, one quadrilateral and two triangles can make a hexagon, or two quadrilaterals can make a hexagon.
This kit can be a very useful tool to understand angles. To start with, one can try to arrange the angles in each piece in ascending or descending order of the measures of their interior angles. It is also interesting to discover which angles in each polygon are the same and which are different. Like in the case of a trapezium. There are two angles which are acute and two angles which are obtuse. The acute angles are equal and the obtuse angles are also equal to each other. See the image given below. Angles marked in black are acute and equal and ones marked in red are obtuse and equal.
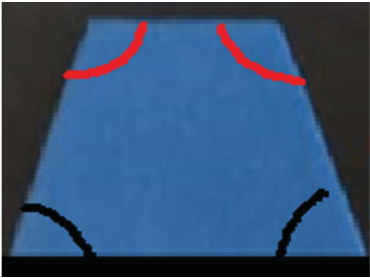
Children would have to devise strategies to do this comparison in the absence of a protractor.
The first five angles are arranged in ascending order in the next picture.

The activity I find the most interesting is the activity to find the measures of angles of the various pieces in the kit without using a protractor. This activity can be very enriching and can help children develop a strong understanding of angles.
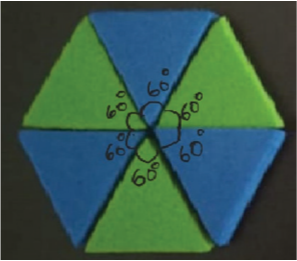
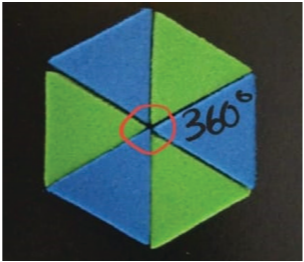
Using just the fact that the sum of angles around a point is 360 degrees, one can find measures of all the remaining angles.
Like, one can establish that the measure of all angles of this piece ![]() is 60 degrees.
is 60 degrees.
After one knows the measures of some angles, one can find the remaining angles. One example is given in the next image.
During this activity, there are ample opportunities to talk about angles and their properties like adding angles, subtracting one angle from another, or comparing angles.
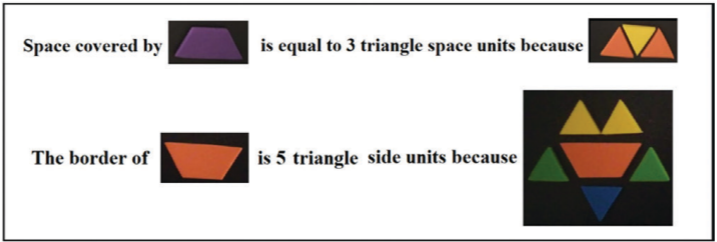
One concept that can be explored using this kit is that of area and perimeter. Children can be asked to make a design and then they can be asked to compare each of their designs and decide which is the biggest. This question can create a situation in the classroom where first the children would try to decide among themselves what is the measure of bigness, the number of pieces used or the space covered, or how big the border is. This is also an opening for teachers to start talking about informal units of area or length.
The design of the kit enables us to use the side of an equilateral triangle as an informal unit to measure boundary or perimeter. Similarly, space covered by an equilateral triangle can be called 1 triangle space unit or 1 triangle area unit, and then one can measure shapes or designs made and children can describe them.
Such hands-on exercises to explore area or perimeter can prove to be very useful when they come across area and perimeter concepts.
Rangometry can be used for a wide range of concepts in school mathematics. For more details about the kit: https://jodogyan.org/activity-resources-primary-rangometry/
Editor's Note
Rangometry was introduced by Jodo Gyan and is now sold by various groups including Navnirmiti. Since these are made of Ethyl Vinyl Acetate (or EVA), they stick to boards (black, white or green) when wet and thus make a great display for the entire class. However, some other groups did make similar kits out of wood. The kits may be easily replicated with any cardboard or card type material as well.
Children are very good at thinking outside the box, usually better than the adults. So, they can use the rangometry kit to create a 3D picture, design, layout etc. which goes much beyond the intended objectives of the adults who designed this!
Also, Mathigon polypad (https://mathigon.org/polypad#polygons) includes similar pieces and more. While the 3D aspect is lost, the user can enjoy the benefits of this virtual resource including but not limited to (i) unlimited pieces that can be arranged and (ii) choice of the colour of each piece.