Charting Shapes: A Fun Exploration of Perimeter and Area


Introduction to the Activity
I started a hands-on classroom activity during the teaching of the unit on perimeter and area. Before diving into the activity, I made sure that the students:
- Had a solid understanding of key concepts such as recognizing basic 2D-shapes (squares, rectangles, and triangles).
- Knew how to measure the length of sides of polygons.
- Understood centimetres and inches – common units of measurement of length.
- Had a good understanding of the concepts of, and difference between, addition and multiplication, and could use these operations in simple sums, which is crucial for calculating perimeter and area.
The goal of the lesson was to help students explore how to find the perimeter and area of various shapes they encounter in everyday life. To begin, I asked students to think about objects they see regularly that have specific shapes, such as their books, desks, and tiles. This sparked a class discussion where students shared their ideas on how these shapes might be measured mathematically.
We then revisited the concepts of perimeter and area, with the key terms written on the board for reference. Through examples and group conversation, students worked together to explore the meaning of perimeter as the total length around a shape, and area as the space within its boundaries. We focused on familiar shapes such as squares, rectangles, and triangles, discussing each one as a group. As students shared their thoughts, we used their contributions to clarify and deepen our understanding of these concepts, making the discussion more interactive.
The Activity Setup
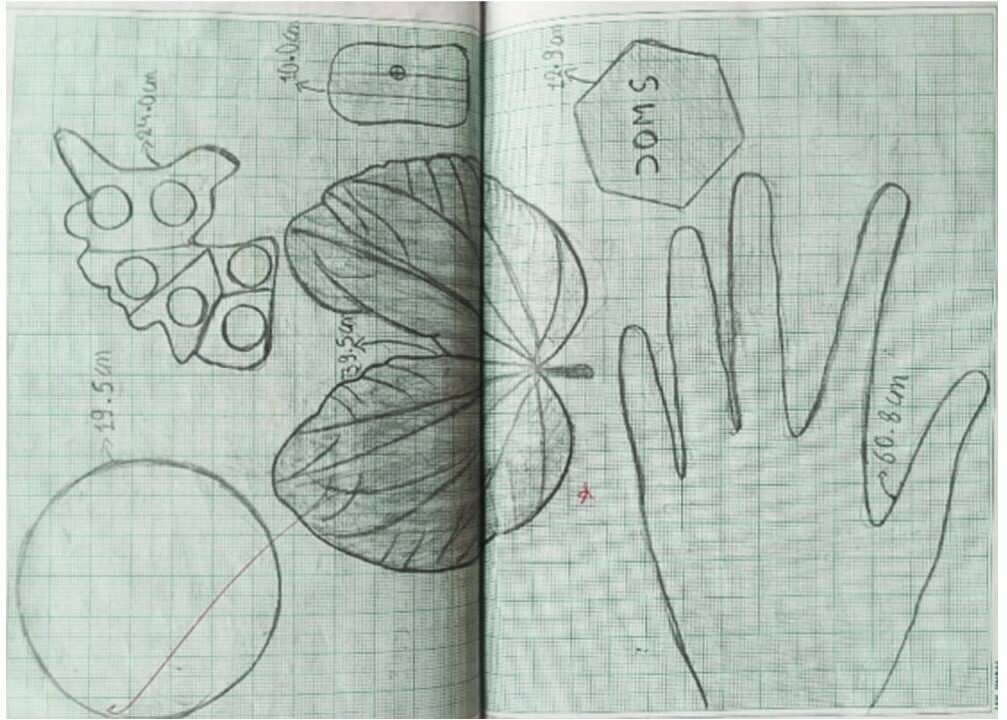
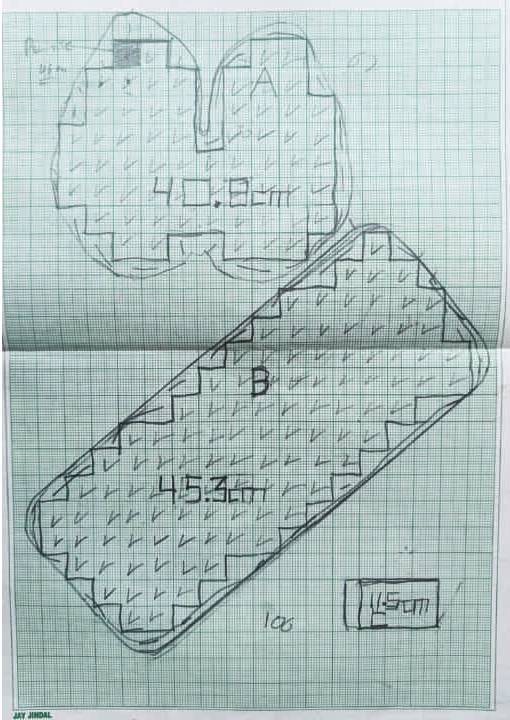
Once the introduction was complete, students were encouraged to explore and choose real-world objects in the classroom to trace on graph paper. They selected a variety of shapes, such as square books, rectangular boxes, circular plates, and irregular leaves. As they began tracing, students discussed how grid paper could help them chart the shapes and how they could use the squares to estimate areas.
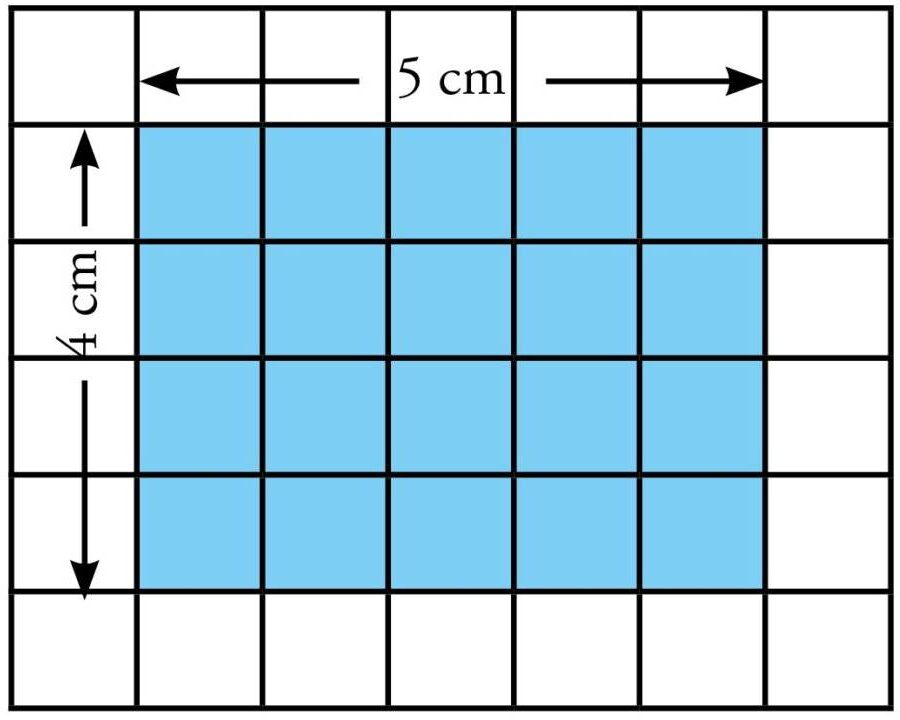
We did this example for a rectangle that spanned across five squares horizontally and four squares vertically. They calculated the perimeter using 5 + 4 + 5 + 4 = 18 cm and the area using 5 × 4 = 20 cm2. (We were using a centimetre grid.)
During this time, students shared their ideas about how to measure perimeter, with some recalling that it was the total length of all sides. The example helped them recall how grid lines could be used to measure the sides of regular shapes by counting squares.
Each student was provided with graph paper, a ruler, and a pencil, and was encouraged to carefully trace the outline of the chosen objects. As they worked, students discussed their approaches with one another, sharing ideas about how to calculate the perimeter and area of the shapes they traced. While they engaged in this process, I moved around the room to observe their strategies, offering support and answering questions when needed. This allowed students to take ownership of their learning, while also having opportunities for guidance and clarification as they explored the concepts.
Student Engagement and Teacher Observations
As the students began their work, it was exciting to see their enthusiasm in applying what they had learned. Some students, however, expressed uncertainty about using the grid to calculate area.
They shared their thoughts with the group, and through this discussion, they were able to refine their understanding of the concept. The collaborative exchange helped them move forward with greater confidence. It was rewarding to witness how the hands-on activity, combined with peer feedback, allowed them to engage deeply with the task.
One student, while tracing her handprint, asked, “What if the shape has curved or irregular edges? How do I find the perimeter?” This sparked a conversation about different methods for measuring such shapes. Students discussed various approaches, including the use of thread to trace the outline, which could then be measured with a ruler to approximate the perimeter. As we explored why a straight ruler might not work directly for curved lines, students shared their own examples of irregular shapes where the thread method could be useful, further expanding their understanding of perimeter estimation.


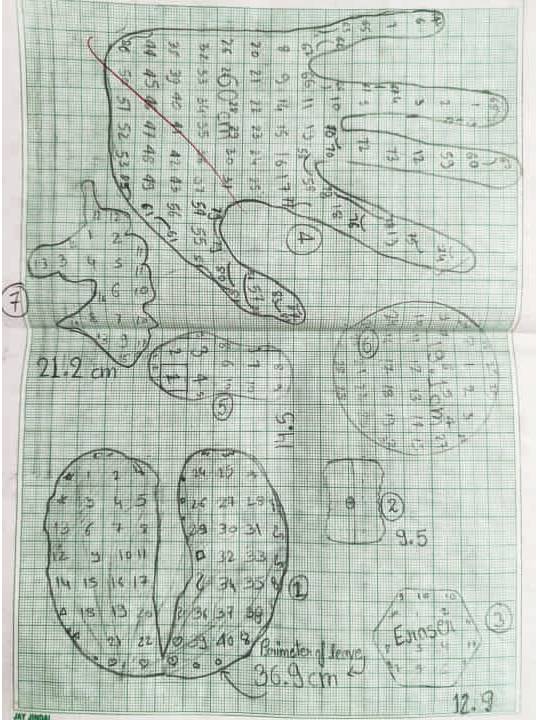
Then I observed something amazing. One student in the side desk, was tracing a leaf in his graph paper. For finding the boundary he didn’t use thread; in fact he had drawn the sides of squares inside the leaf on the graph paper for finding the perimeter (Figure 5). It was unexpected but gave me the golden chance to have a discussion with all students on the Estimation of perimeter. (This was done in a subsequent class, when we compared his estimate with the estimate using thread.)
After using a thread to trace the perimeter of their irregular shapes, several students compared the measured thread length to their earlier estimates made using a ruler or by approximating with straight segments. They noticed that their initial estimates were often larger than the string measurement. This led to a valuable discussion about how estimating curved edges with straight tools can lead to overestimation, and why flexible materials like thread provide a more accurate measurement for irregular shapes. It helped students appreciate the importance of choosing appropriate tools based on the nature of the object being measured.

During the discussion, many students said that they had used thread to estimate the perimeter, showing their engagement with the method to measure irregular shapes. While this approach sparked interest and creativity, it also led to a conversation about its accuracy. Students discussed whether the thread method was the most reliable way to measure perimeter, especially for irregular shapes. The thread method doesn’t offer the precision required for accurate measurements. This prompted me to reflect on how clearly I had communicated the purpose of using grid lines for measuring sides. We had discussed the grid as a more structured and precise method, allowing students to count units directly along the sides, making it a more reliable technique for calculating perimeter, especially for regular shapes.
Several students also had questions about how to deal with partial squares when calculating the area. One asked, “How do I count the squares that are only partially covered by the shape?” I demonstrated that they could estimate by counting all the full squares and then approximating the areas of partial squares, encouraging them to focus on getting close but not necessarily needing precision.
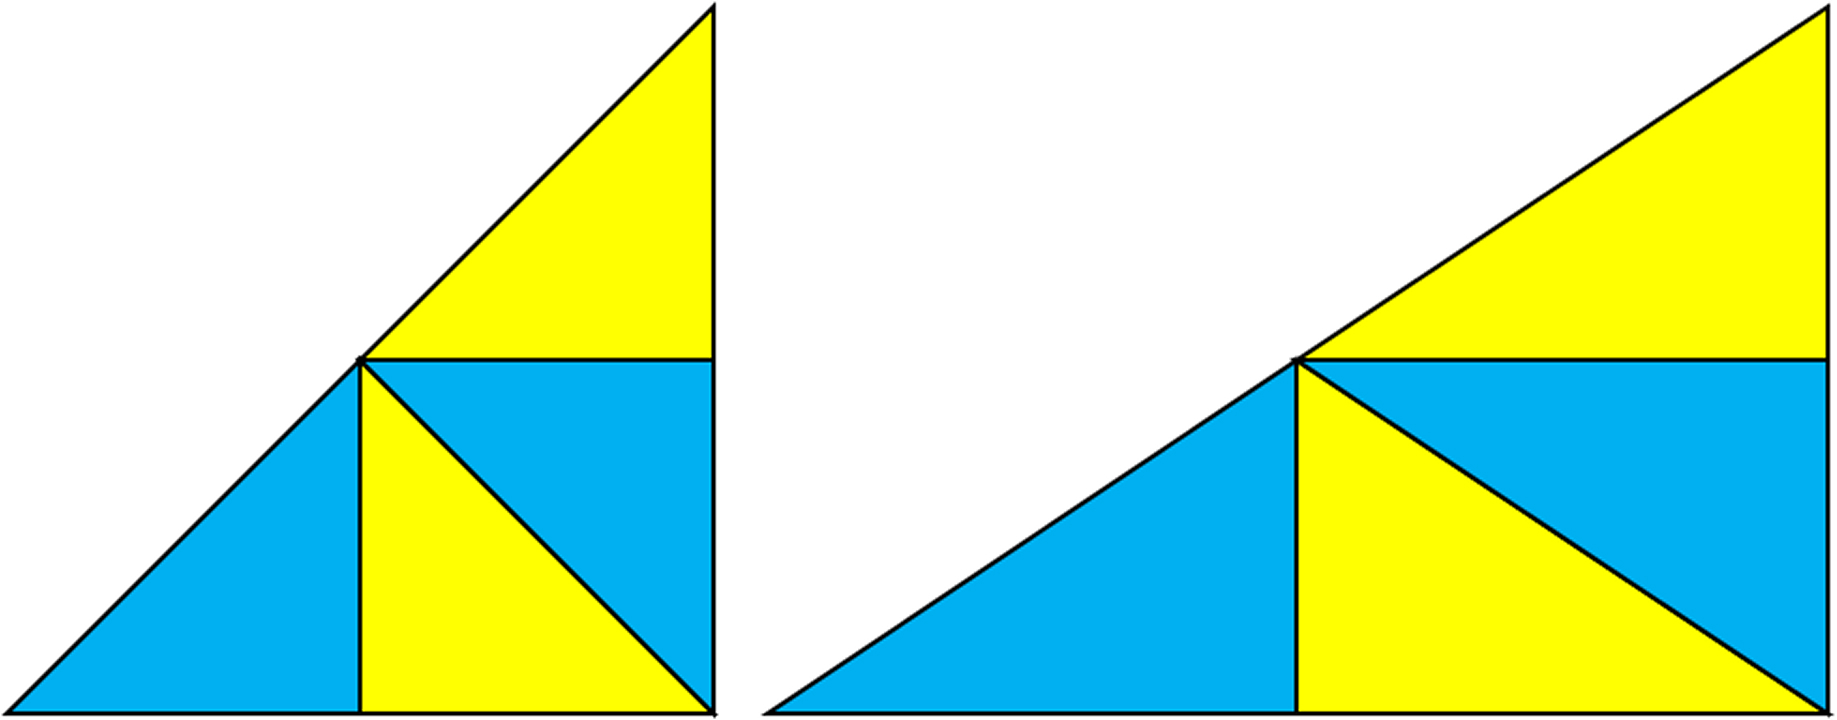
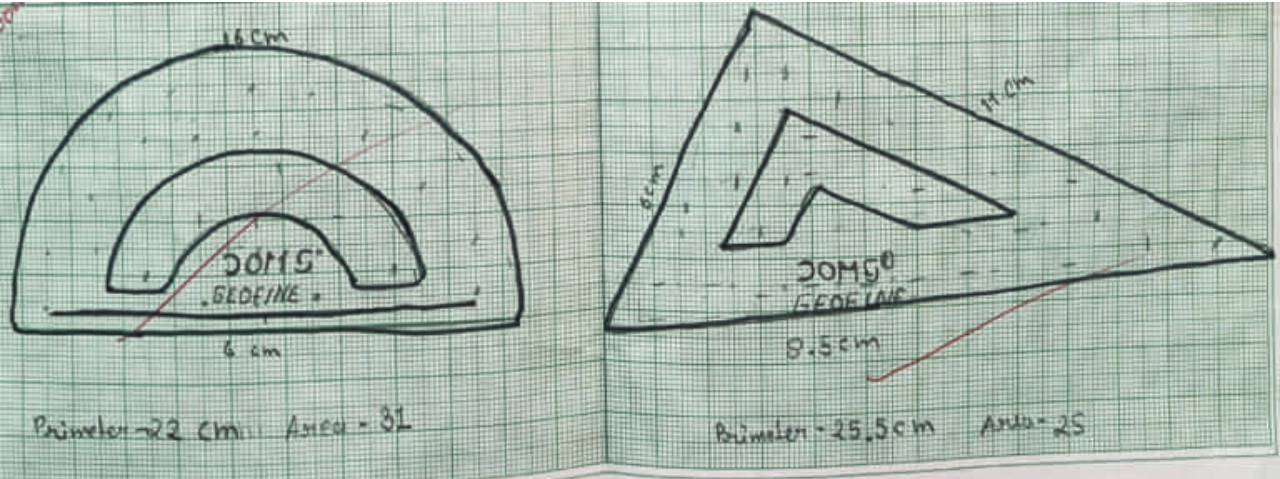
From the last bench of the classroom, a girl called me for help and asked, “What if the shape is like this? Is the boundary inside also part of the perimeter?” I looked at her shape. It was the set triangle from her geometry box (Figure 8). For area, she had calculated the region correctly but was confused about the perimeter. Since it was important to know for everybody, I took it up in the next class after discussion with the other teachers.
For providing the context, I started like this – let’s imagine a park with a pond in the centre. I drew the shape of the park with the pond on the blackboard.
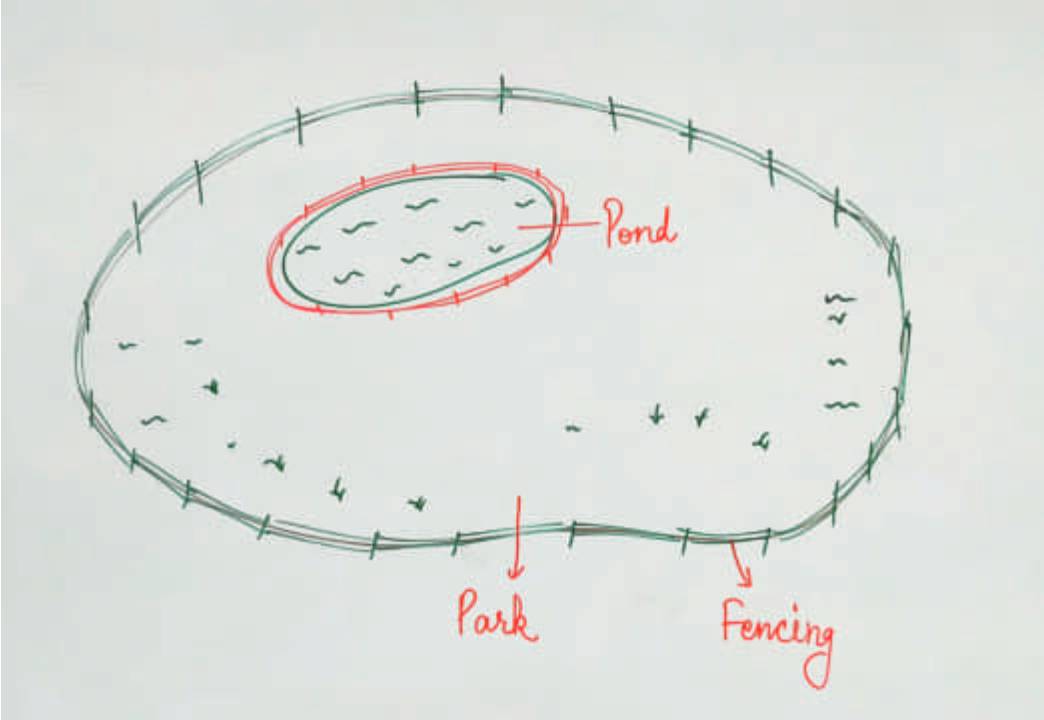
Then I asked, “If I want to protect my park by putting a fence around the park, what do you think the total length of the fence will be?” They answered that the park needed to be protected from the outside, but to stop children from going into the pond, we need the fence around the pond also. So, for the total length of the fence of the park, we need to count the inside fence too.
In response to the students’ suggestion about needing to count the inside fence around the pond, I explained that this depends on how the fence is intended to be placed. I clarified that if the goal is to protect the park and its surroundings, the fence should only surround the perimeter of the park, not the perimeter of the pond. The fence around the pond would be needed only if we specifically wanted to separate the pond from the park, for example, to keep children away from it.
Teacher Reflections on the Activity
Looking back at the activity, I believe it was a valuable learning experience for both the students and me. The most successful aspect of the lesson was how students engaged with a variety of real-world objects. They seemed to enjoy tracing the shapes and experimenting with applying mathematical concepts in a hands-on, tangible way. The use of graph paper proved to be especially helpful, as students were able to visualize and count the squares, making it easier for them to determine the area of shapes, even those that were irregular. Their independent exploration and application of these concepts highlighted the importance of providing opportunities for students to learn through active involvement.
Student Responses and Growth
Throughout the activity, it was clear that the students were engaged and eager to learn. They actively participated in the tracing and measuring tasks, asking thoughtful questions along the way. Some of their responses demonstrated real growth:
- Student 1 said, “I traced my dictionary and counted the squares on the graph paper. I found the area by multiplying the length and width, and the perimeter by adding up all the side lengths.”
- Student 2 shared, “I had trouble with my bottle cap because I didn’t know how to find the perimeter of a curve, but after using the thread, it made sense. I used the thread to measure the boundary of the circle then found the length of the thread from my ruler.”
- Student 3 commented, “I traced a hexagonal eraser, and I had to break it and count the partial squares to find the area. It was tricky, but it worked!”
These responses showed me that the students were not only applying their knowledge but also thinking critically about how to approach more challenging shapes.
Conclusion
In conclusion, it was exciting to see how the students navigated challenges, whether it was measuring irregular shapes or figuring out how to count partial squares for area. Through their own exploration and problem-solving, they developed a deeper understanding of these concepts. Looking ahead, I plan to give students more opportunities to explore complex shapes and refine their skills in calculating perimeter and area, allowing them to practise and build confidence at their own pace. This activity was a great reminder of the power of hands-on learning and how, when students take the lead, they can surprise us with their creativity and insight.