A Lens to view Summative Assessment in Preparatory Stage Mathematics


The companion article presented the opinion that formative and summative assessments should be used meaningfully to help students attain grade-specific learning outcomes and stage specific competencies. Tasks should not create unnecessary stress or anxiety among students, should be feasible to implement in a classroom setting, and provide students and the teacher with opportunities to synthesize their learning, and at the same time give solid evidence of students’ preparedness (gauged against the prescribed competencies) to move to the next stage of learning.
Strategies used for summative assessments that are both age-appropriate and aligned with research and policy evidence should include more than written assessments which are not sufficient to assess the competencies of the preparatory stage. Also, the reporting of summative assessments should go beyond marks and grades. There should be qualitative descriptions of the child’s competencies that are easy to understand.
This article shares some sample strategies which may be used along with written assessments to make a summative assessment of the competencies attained by the student. Some scoring tools to assess them are also given. The tools given here are not exhaustive. Teachers can try out different combinations of tools for the same task [1].
As teachers engage with the activity rich Mathematics textbooks at the preparatory stage, a recurring concern is how these activities can be adapted into summative assessments that are both meaningful and feasible. The following strategies illustrate how students’ attainment of competencies can be assessed as well as reported while placing emphasis on the formative use of summative assessments. Each strategy is illustrated with sample activities and it is hoped that teachers can design more of them to assess the different competencies prescribed for the preparatory stage.
Strategy 1: Exploration
The task described here helps to assess the competency “Deduces that shapes having equal areas can have different perimeters, and shapes having equal perimeters can have different areas” as described in the National Curriculum Framework for School Education 2023 [4, P.274].
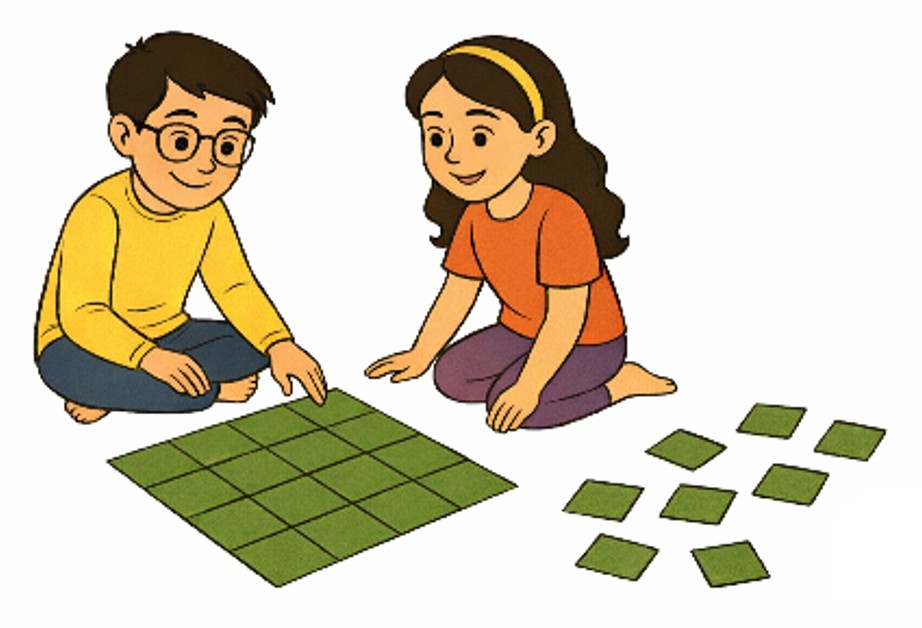
The following is an exploration activity that has been designed as pair-work to be conducted at the end of the unit on measurements (area and perimeter of squares and rectangles) in Class 5. This task can be conducted in 60-80 minutes.
Traditionally, summative assessments are for individual work, but exploration tasks work better in small groups. Of course, if a child chooses to work alone, the teacher may decide to give him or her this opportunity. The observation rating scale (Table 2) given at the end of this strategy helps the teacher to assess each individual child.
Instructions
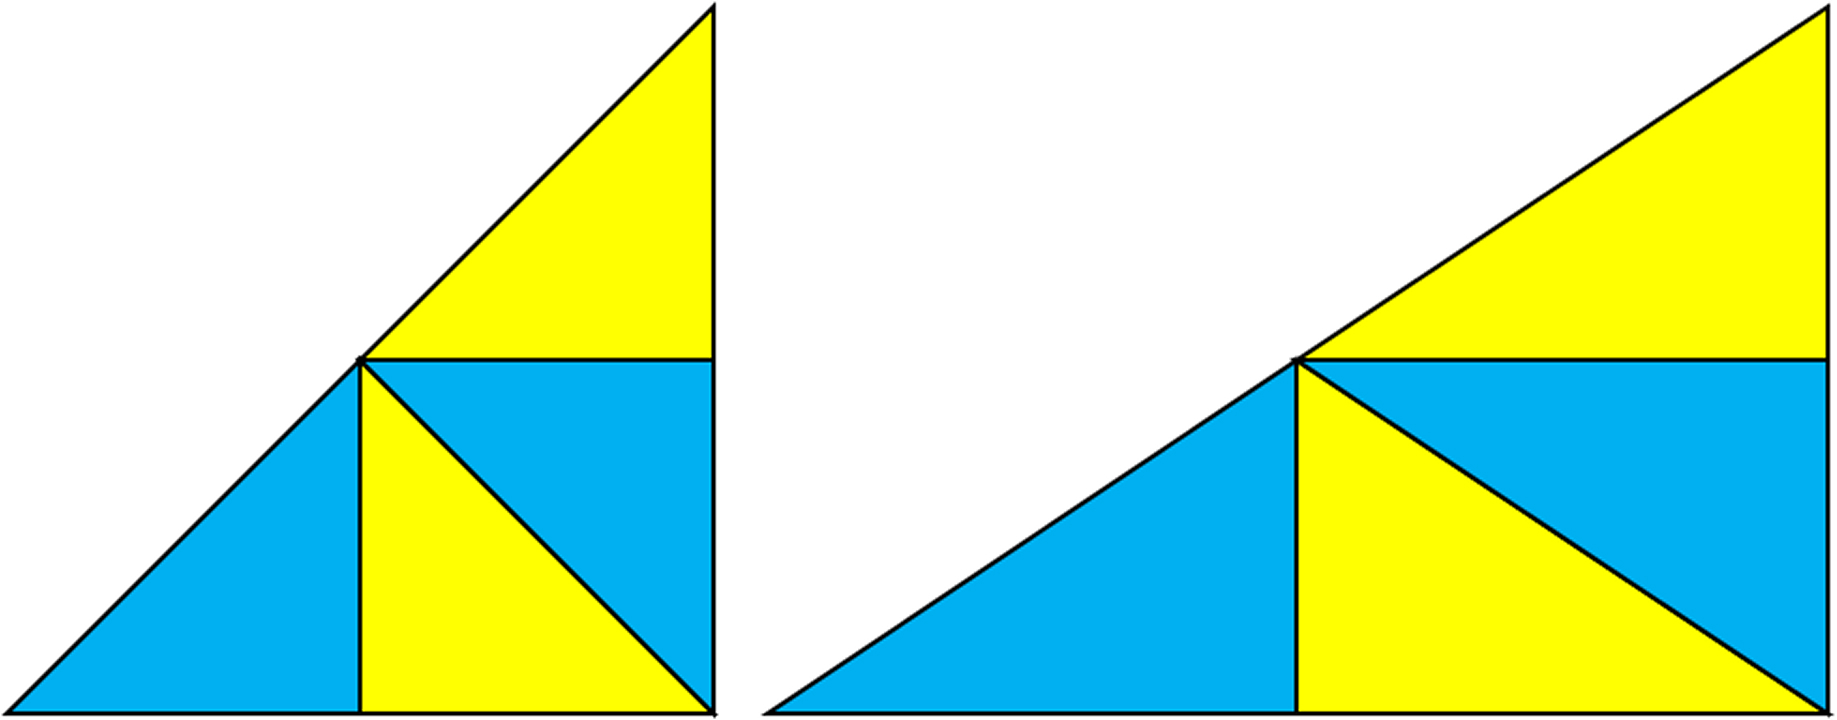
You have 24 squares, each of side one unit. Your task is to use all 24 squares and make as many different rectangles as you can.
Alone or in pairs, draw the rectangles formed using 24 squares, on the given grid sheet and write the measure of the length and breadth of each rectangle.
Now, each of you will make the table (Table 1) below. Without any discussion with each other, take turns to note down the length and breadth of all the rectangles made.
| Rectangle Number | Length | Breadth | Area | Perimeter |
|---|---|---|---|---|
| 1 | ||||
| 2 | ||||
| 3 |
Table 1
Without any discussion, answer the following questions with the help of the table and the figures made.
- Which rectangle has the smallest perimeter?
- Which rectangle has the largest perimeter?
- What is the area of each rectangle formed?
- What changes do you notice in the perimeter when the shape becomes longer and thinner?
Note to the Teacher
- Though the task begins with pair work, students are assessed individually.
- It is not mandatory that the children use the given squares. Children who want to work without using concrete materials may be allowed to do so.
- Provide sufficient time for the student to think through the problem, before providing any kind of support to the child, as summative assessment is the objective of this exercise.
- Feedback is not to be given during the task; after the task is completed, the teacher can have a discussion with the whole class.
Rating Scale for Teacher Observation
| Observation | Always | Sometimes | Never |
|---|---|---|---|
| Records the length and breadth of rectangles correctly. | |||
| Calculates the area and perimeter for each rectangle. | |||
| Observes that the area of the rectangle remains the same, even if the length and breadth change. | |||
| Deduces the change in perimeter when rectangle becomes longer and thinner. | |||
| Uses mathematical vocabulary related to area and perimeter to interpret a given context. |
This strategy enables a formative use of summative assessment because the teacher uses the learner’s responses to diagnose misconceptions and provide feedback, and learners reflect on their understanding of the relationship between area and perimeter, turning the end-of-unit task into a learning opportunity. A somewhat similar exploration may be done with sticks of the same length to make rectangles with fixed perimeter but varying area.
Here the comprehensive and multidimensional nature of summative assessment also plays an important role, using a variety of methods, such as teacher observations, written work, oral responses, and performance-based tasks, to capture the full range of student learning.
Strategy 2: Project
A project is a form of assessment which can connect Mathematics with real world applications. It provides the scope for formative assessment and at the same time, is summative in nature [1].
While doing a project, students work together in groups, with the teacher taking on the role of a guide and a facilitator. Time slots during school hours are set aside for them to plan, discuss ideas, and complete the work, with the teacher guiding them whenever needed. Students are encouraged to use low-cost or no-cost materials that are easily available. Projects are practical, hands-on, and possible for every student to do. They also help students learn how to work as a team and solve problems together.
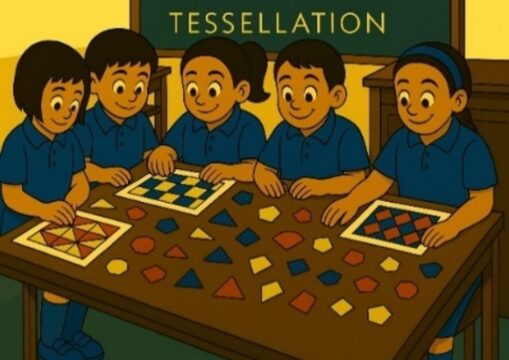
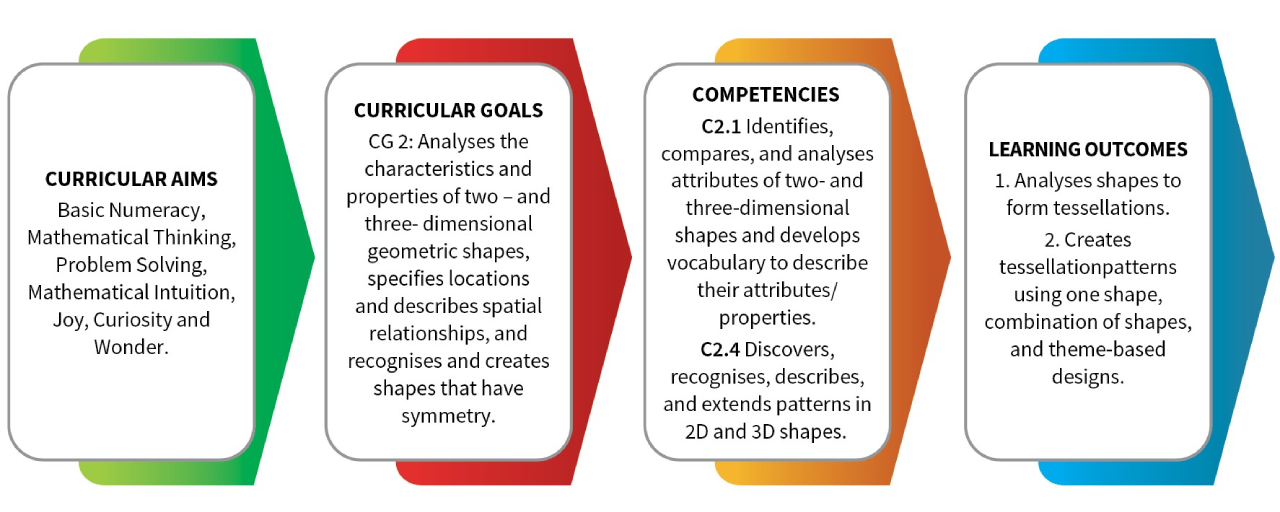
Overview: This project is designed for Class 5 students. Students take on the role of pattern designers, diving into the fascinating world of tessellations. They start by exploring which polygons can tessellate and intuitively uncover the reasons behind it. This project will develop spatial reasoning through pattern making. Along the way, they experiment with combining different shapes and bring their creativity to life by designing theme-based tessellation art. A flow down of the learning standards with reference to NCF SE 2023 [4] for the project is given below:
Group Task
The teacher provides a kit containing shapes to each group of three or four students. The kit contains cutouts (one each) of a regular triangle, square, regular pentagon, regular hexagon and regular octagon, all having the same side-length. The kit also has a rectangle whose breadth is equal to the side of the square and whose length is twice its breadth. There are three stages in this project. In each stage, students will make tessellations, on dot sheets, chart paper or any other creative mode. It is presumed that students are familiar with these shapes and have attempted tessellation activities. Students may replicate the shapes in the kit as per their need and can be creative using colours or patterns. The teacher can complete the assessment across the periods allocated in a week.
Stage 1 – Single Shape Tessellation (50-60 minutes)
- Classify the shapes in the kit based on whether they tessellate or not.
- Choose any two shapes that tessellate by themselves. Create single shape tessellations with each.
Stage 2 – Mixed Shape Tessellation (30-40 minutes)
- Identify all the pairs of shapes that tessellate with each other.
- Make a mixed shape tessellation using one of the identified pairs of shapes.
- Explain the pattern formed in your own words.
Stage 3 – Creative Theme Tessellation (80-90 minutes)
- Choose a theme from your surroundings (For example Nature, Cityscape or Weaving).
- Create tessellations forming designs for wallpaper, carpet, clothing or any other art form using at least two shapes, based on your theme.
Each group will display their tessellations and share their reflection with the whole class after the completion of all the three stages. Each group can be given 20 minutes to prepare their presentation and 8-10 minutes for their presentation.
There is an aspect of reflection included in the presentation. The teacher has to enable this by sharing some guiding questions with the class, while they prepare their presentations. Here are a few guiding questions which could be used:
- How did you decide which shapes to use to create the design?
- You might have faced some challenges during the process. Share an example of a challenge and how you resolved it.
- What did you learn from working with the team?
Teachers can use rubrics to assess the projects. The main purpose of rubrics is to assess performances [2]. For some performances, you observe the student in the process of doing something, and for other performances, you observe the product that is the result of the student’s work. Rubrics can be developed based on criteria such as pattern accuracy, artistic execution, mathematical reasoning, presentation, and collaboration, using a three-point scale. A sample given in Table 3, will help the teacher to assess the students (in small groups) during the three stages of the project. The total score is taken as 10. The indicators for this rubric have been derived from the learning outcomes of the project, listed in the flow down above (Figure 3).
| Part of the Project | Score | Indicators* |
|---|---|---|
| Stage 1 | 3 |
→ Identifies three or more shapes that tessellate with itself
→ Identifies two shapes that do not tessellate with itself
→ Makes two single shape tessellations
→ Demonstrates good coordination during the process
|
| 2 |
→ Identifies two shapes that tessellate with itself
→ Identifies one shape that does not tessellate with itself
→ Makes two single shape tessellations
→ Demonstrates good coordination during the process
|
|
| 1 |
→ Identifies one shape that tessellates with itself
→ Does not identify any shape that does not tessellate with itself
→ Makes a tessellation using single shape
→ Struggles to coordinate with others
|
|
| 0 |
→ Identifies no shape that tessellates with itself
→ Does not make a tessellation
→ Struggles to coordinate with others
|
|
| Stage 2 | 3 |
→ Identifies more than two pairs of shapes that tessellate with one another
→ Makes a mixed tessellation with any one pair of shapes
→ Explains the pattern in their own words (during presentation)
→ Demonstrates good coordination during the process
|
| 2 |
→ Identifies two pairs of shapes that tessellate with one another
→ Makes a mixed tessellation with any one pair of shapes
→ Struggles to explain the pattern (during presentation)
→ Demonstrates good coordination during the process
|
| Part of the Project | Score | Indicators* |
|---|---|---|
| Stage 3 | 1 |
→ Identifies one pair of shapes that tessellate with one another
→ Struggles to make a tessellation with the identified pair of shapes
→ Struggles to explain the pattern (during presentation)
→ Struggles to coordinate with each other
|
| 0 |
→ Cannot identify a pair of shapes that tessellate with each other
→ No tessellation is made
→ Struggles to coordinate with each other
|
|
| 4 |
→ Creates a tessellation using at least two shapes representing the chosen theme
→ Orally presents a detailed analysis of the design in terms of shapes used for tessellation
→ Demonstrates good coordination during the designing process and presentation
→ All team members are reflective of the process
|
|
| 3 |
→ Creates a tessellation using at least two shapes, representing the chosen theme
→ The oral analysis is not detailed; but it does cover some aspects of the design
→ Demonstrates good coordination during the designing process and presentation
→ Only some team members are reflective of the process
|
|
| 2 |
→ Creates a tessellation using at least two shapes, but it does not represent the chosen theme
→ Does not have an analysis of the design
→ Some participants are active while others are passive in doing the work
→ Only some team members are reflective of the process
|
|
| 1 |
→ Creates a tessellation using at least two shapes, but it does not represent the chosen theme
→ Does not have an analysis of the design
→ Lacks coordination in doing any task during the process
→ Reflections are not a part of the presentation
|
|
| 0 |
→ Does not have a design to present
|
Table 3
Note to the Teacher
- This rubric is to be used by the teacher to assess the students during the process of doing the project. The indicators will guide the teacher to note down the observations about each group.
- Refer to NCERT Class 5 chapter 7 Shapes and Patterns for more details on tessellations.
- Teacher may add other tools like checklist or rating scale to incorporate individual assessment of students.
This project, as summative assessment, clearly provides opportunities for students to synthesize their learning, tracks students’ progress against learning standards and determines whether students are ready to progress to the next stage.
Strategy 3: Demonstration Task
Geometry chapters such as Fun with Symmetry, Shapes and Patterns around us, and Hide and Seek from the Class 4 NCERT Mathematics textbook [5] can be assessed through demonstration as well. In the proposed assessment, the teacher needs to spend quality time with the students in the classroom, math lab, or any available open space, so that children have enough space to spread out the materials and work with them. Each child is given these questions to work on individually to demonstrate their understanding. A few examples of tasks for demonstration to assess competencies like ‘Identifies, compares, and analyses attributes of two- and three-dimensional shapes and develops vocabulary to describe their attributes/properties’ and ‘Discovers, recognises, describes, and extends patterns in 2D and 3D shapes‘ [4, P.274] are given below.
Materials needed (per child):
Task 1: Cubes or building blocks or match boxes (all of same size) – 10
Task 2: Pieces of straws / sticks of equal length – 9
Task 3: Cutouts from papers of two different colours – 30 (of each colour)
- Imagine that you are viewing a building from different positions. Figure 4 shows views of the front, top and right side. Each pink square represents a cube. Using ten such cubes, create a model of the building.

- In how many ways could you make a building, using all the ten cubes? Demonstrate.
- Suppose the given information is only front view and the top view, while the side view is not given. Does the building remain the same as in (a)? If not, show two or three different buildings you can make.
- You are provided with straws / sticks of same length. Make three triangles, each having sides of the same length using exactly (a) 7 straws (b) 8 straws (c) 9 straws. (Remember you cannot bend or cut straws. They cannot be inserted into one another also.)
- You are given a square grid sheet. You can fit in the two given tiles in each square of the grid. Try out different positions of the tiles (standing, lying down) and create designs for tiling walls or floors. In each design, you can find a repeating unit. Identify the repeating units. Come up with at least two such designs.
Note to the Teacher
- This task emphasizes the capacity of visualisation, which cannot be assessed in a pencil and paper test. More such tasks can be designed by the teacher.
- The teacher may decide to choose one or more tasks, depending upon the time decided by the school for this assessment and the availability of materials.
- 20–30 minutes can be allotted for task 1 and 10–15 minutes each for Tasks 2 and 3. Teachers can decide the time for each task based on their understanding of the class.
A checklist can help students assess the completeness of their work, so they know they are turning in what is required and are developing work habits in the process [2]. A sample of self- assessment checklist is given here. This helps the learners assess their own achievement.
| What to look for? | Yes / No |
|---|---|
| Task 1 | |
| • I am able to place the blocks with respect to each view – front, top, side. | |
| • I am able to imagine / visualize the building using the given views. | |
| • I could identify that if the side view is not given, there could be many possible buildings. | |
| Task 2* | |
| • I can create three triangles with 7 straws. | |
| • I can create three triangles with 8 straws. | |
| • I can create three triangles with 9 straws. | |
| Task 3 | |
| • I was able to create two designs using the two tiles in different ways. | |
| • I could identify the repeating unit of each design I made. |
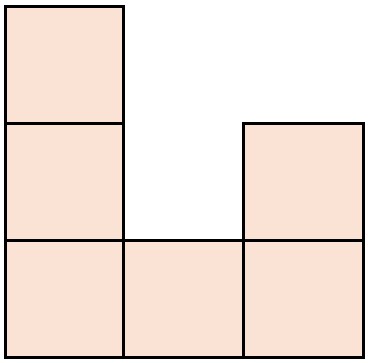
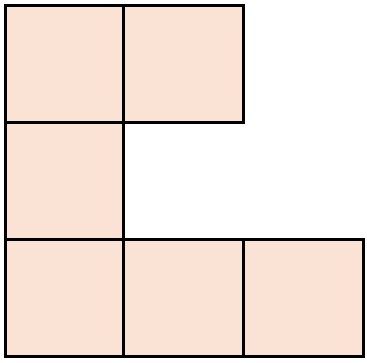
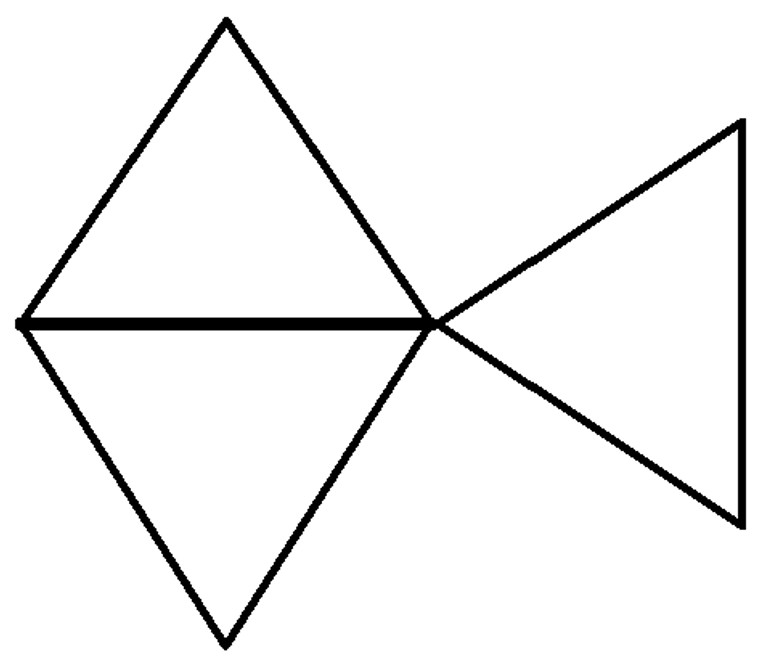
*Some possible outcomes for Task 2 are given below:
| Number of Straws | Some Possible outcomes with three triangles |
|---|---|
| 7 |

|
| 8 |
 Note: There are more possible outcomes in this case. |
| 9 |
 Note: There are more possible outcomes in this case. |
The teachers can also design a rubric to assess the demonstration.
It is hoped that the three strategies described above will inspire teachers to go beyond pen and paper tests, especially for summative assessment. While the tasks may be intimidating initially, each attempt will give the teacher more ideas for improvement in their students’ context and ability. It is expected that children are given ample opportunities to work with materials during concept development, before providing such tasks for summative assessments. With tools like rubrics and checklists which compare the performance of a child against the prescribed competencies, teachers can easily provide qualitative descriptions. By reflecting on the uses of summative assessment, the transitions that the child undergoes in the preparatory stage and by referring to the prescribed competencies, teachers can design assessment tasks that focus on relaxing the student rather than building on their fear and tension. They can be given a sporting chance to help them perform well in high-stakes assessment, not just for marks but also to meet challenges which develop their cognitive abilities and affective skills.
- Authentic assessments, Assessment resources, 2022, Azim Premji University
- Brookhart, Susan M. author. (2013). How to create and use rubrics for formative assessment and grading. Alexandria, Virginia USA: ASCD
- Ministry of Education, Government of India. (2020). National Education Policy 2020
- NCERT. (2023). National Curriculum Framework for School Education. New Delhi: NCERT
- NCERT. (2025). Maths Mela, Textbook of Mathematics for Grade 4 and 5. New Delhi: National Council of Educational Research and Training
- NCTM (2000). Principles and standards for school mathematics. Reston, VA: NCTM