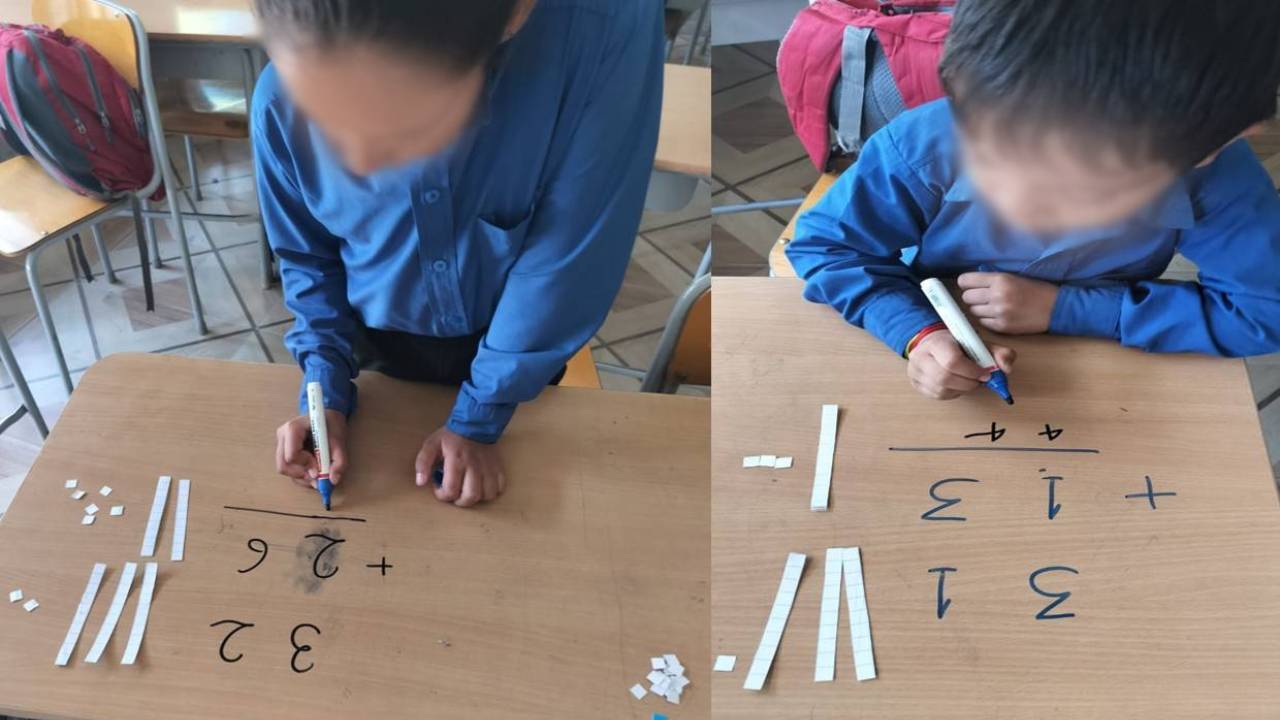
Montessori Approach: (Part 2) An Introduction to Selected Materials and How to re-create them


As the title suggests, this article is the second in the 2-part series that covers a total of six Montessori materials. The first part, in the November 2024 issue of At Right Angles, covered materials 1-4 i.e., pink tower, brown stairs, long rods and number rods [1]. This article covers cylinder blocks and knobless cylinders.
The Montessori Curriculum consists of five key areas of study: Practical Life, Sensorial, Mathematics, Language, and Culture. There is a set of Montessori materials for each area, focussing on a key knowledge or skill. In this article, we will look at some of the sensorial materials, specifically those that allow for visual discrimination (thin, thick, tall, short). As you read through, you will realise that there’s so much more to them- mathematics, language, attention to detail and a lot more that is intertwined! It will hopefully give a glimpse of what can be done in the class and what to expect as an outcome from it.
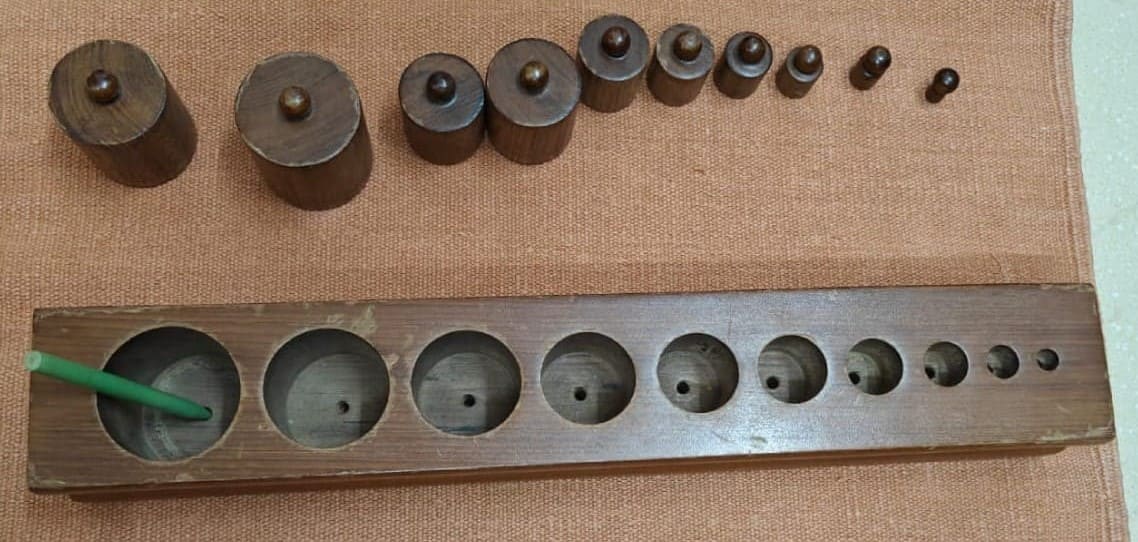
Material 5: Cylinder blocks
There are 4 sets of cylinder blocks, consisting of 10 cylinders each, placed in a case with sockets to hold each of them. In one set, the cylinders are placed from big to small (Figure 1- bottom). In another, they are placed from thick to thin (Figure 1- left side). In the third they are placed from thick and short to thin and tall (Figure 1- top), and in the fourth set they are placed from tall to short (Figure 1- right side).
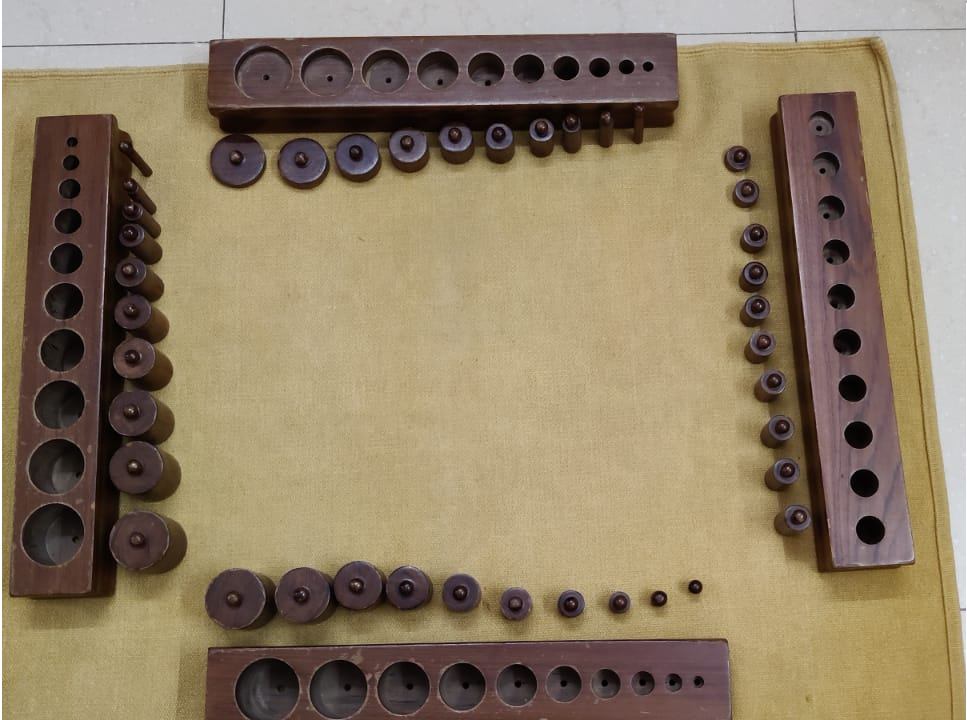
How to use: The sets of blocks are introduced to children one by one, in the order mentioned above. The child places the block on the mat and removes all the cylinders. The cylinders are placed randomly and the child is asked to put them back in, in the right place. Notice that the activity cannot end with cylinders wrongly placed or some holders left empty. A child will be able to, by trial and error initially, place all the cylinders correctly before moving to the next set. This is one example of how Montessori materials are self-corrective.
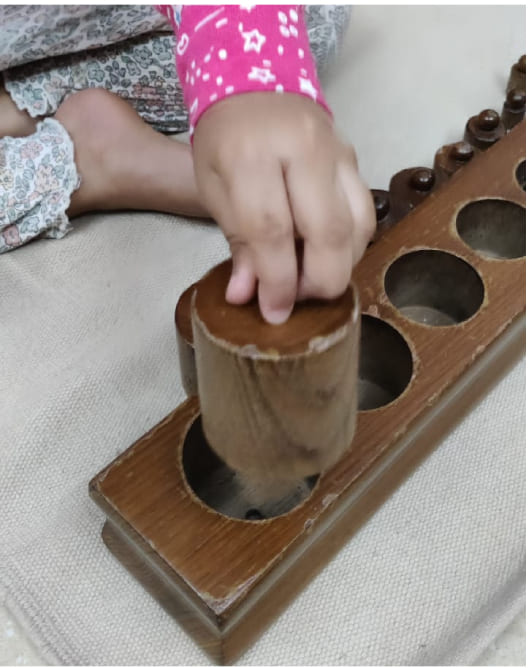
A subtle point to note is that activities such as this, help prepare the child towards holding a pencil and developing fine motor skills. Seemingly small things such as this are paid attention to in the creation of each material. (Figure 2)
Additional Activities
Activity 1: Once the child is comfortable placing the cylinders correctly, the blocks are removed and the cylinders are placed randomly on the mat. The child is now asked to arrange them in increasing or decreasing order, without the block with sockets available to confirm their placement (one block set at a time).
Activity 2: Two block sets are placed in an L-shaped arrangement (big to small and thick to thin for instance) and all the cylinders in them are removed and mixed up. The child is now asked to place each of them in their right place. This activity is repeated with 3 sets and eventually with all 4 sets (this may be more apt for 6 year-olds).
Activity 3: The cylinders are placed in a tray and kept in another room. An indicator (or one could use a pencil in its absence) is kept in one of the sockets. The student is asked to go to the tray and pick the right cylinder that can be placed where the indicator is kept. This activity involves visual recognition of the dimension of the cylinder, keeping it in memory and identifying the right cylinder from the tray. Multiple attempts are allowed initially in case the child needs them.
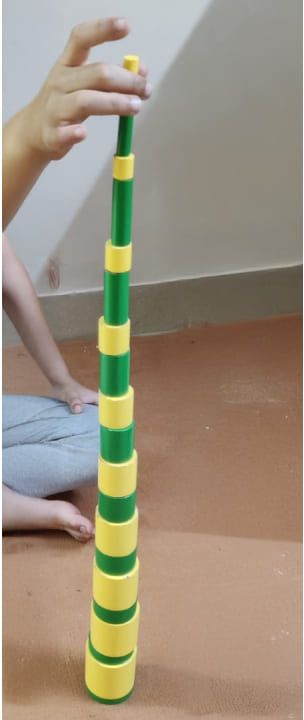
Material 6: Knobless cylinders
Another variation of the cylinder blocks is the knobless cylinder (or coloured cylinders). They replicate the cylinder blocks, but do not have sockets to be placed into, or the knobs to hold. They are in 4 colours- red (thick to thin, constant height), yellow (big to small), green (short and thick to tall and thin) and blue (tall to short, constant diameter) as shown in Figure 4.

Activities similar to those described for the cylinder blocks can be performed with them. One can also match each set of cylinder blocks with the coloured cylinders.
Coloured cylinders allow for towers to be formed as they do not have knobs (An observation that children will make on their own too!). This is a great exercise for children to develop focus, patience, and an understanding of balance. Figure 5 shows two sets of coloured cylinders- the green one moving from thick and short to thin and tall, and yellow moving from big to small. They are to be placed alternately, with the same base of green-yellow pair placed one above the other.
There are exactly 4 possibilities if we vary the dimensions of any cylinder:
- Same height, varying thickness (diameter) – Red
- Same thickness (diameter), varying height – Blue
- Both height and thickness (diameter) increasing – Yellow
- Height increasing and thickness decreasing – Green
It is fascinating how Dr. Maria Montessori came up with this complete exposition of all possibilities so many years back. Such a holistic exposure prevents a learner from forming misconceptions such as bigger is thicker or smaller is shorter or thinner is shorter!
As in the previous article, we bring to you cost-effective ways of creating these Montessori materials without compromising on precision or quality. Here are the simple steps to make the knobless cylinders (Figure 6).
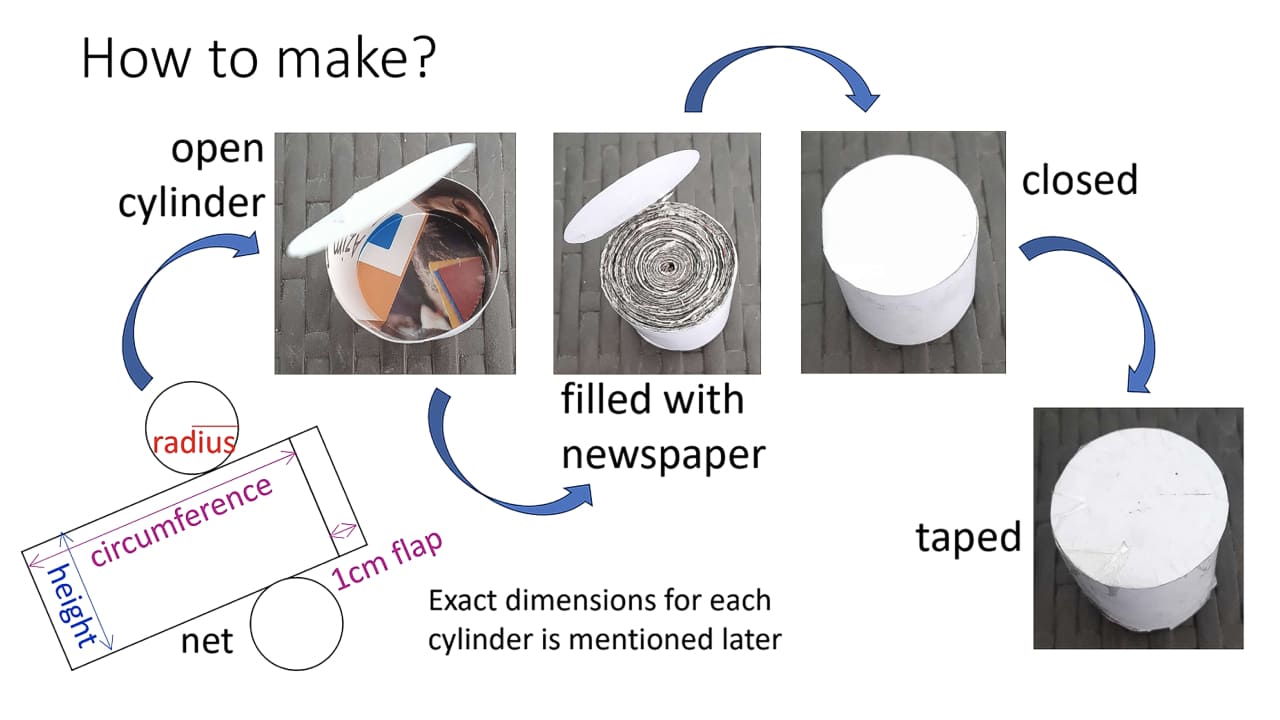
The exact dimensions of the nets and all other details can be accessed at [2]. In fact, there are printable nets of cylinders on that link, that you can print on an A3 sheet and you are good to go!
By incorporating Montessori materials into a child’s learning environment — whether purchased or re-created — we are embracing an educational approach that prioritizes independence, hands-on discovery, and respect for each child’s natural development.
Montessori education nurtures not only cognitive growth but also fosters critical life skills like problem-solving, responsibility, and confidence. The beauty of re-created materials is that they make this philosophy more accessible, allowing teachers, families and educators to create learning tools tailored to their needs without compromising on quality or intent. By integrating these materials into our home or classroom, we are taking an important step toward cultivating a generation of curious, confident, and capable individuals.
We urge you to try them out and share your experience with us. Send us photos of your creations, and let us know how it went in class with your students! You can write to us at atrightangles.editor@apu.edu.in.
Acknowledgement: This article is written in collaboration with Ms. Sudha Rao, Parijatha Montessori, Bangalore and Swati Sircar, Azim Premji University, Bangalore.
- Montessori Materials Part 1 https://bit.ly/3PHeZy9
- How to make the cylinders https://bit.ly/3PHf3hn